How to Make Jewelry Using Ceralun Epoxy Clay
How to Use Swarovski Ceralun Epoxy Clay with Crystal Chatons.


This tutorial teaches you how to work with Ceralun epoxy clay when
embellishing with Swarovski Chatons.
We tested several brands in our studio and chose Ceralun as our favorite brand for ease of use,
working time (also known as pot life), and overall beauty.

Prepare your workspace. You will want to work in a lint-free space. You may want to protect your work surface with a clean sheet of paper. Good lighting is essential. If you have a fan blowing in the room, be sure it’s not blowing toward your work area.
Before getting started, think about the design you want to achieve on the pendant. You may have other items you wish to embed into the Ceralun Clay that were not included with the kit. Ceralun is an adhesive, so why not consider what you may already have on hand to add to your design.
Put the gloves on before handling epoxy clay.Knead together equal amounts of Ceralun (clay) Part 1 and Part 2. Knead until the clay is completely blended and no marbling remains. At this point, the clay is activated and cannot be stored long term. You have about 2 hours at room temperature to work with it. Combine only the amount you need at one time, and save the rest for later. You may need to wash the gloves to prevent contamination.
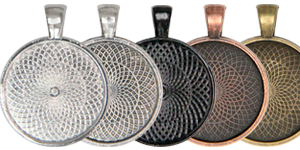
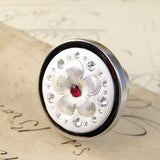
Roll a segment into a ball and press into the pendant tray, bottle cap, ring, etc. Start in the center and work your way to the edges, smoothing the surface as you go. You can have a level surface or a raised surface depending on how much clay you use. Ceralun will keep its shape the way any clay will keep its shape, so have fun with it.
Add your crystals and other decorations by size. Start with the largest piece, such as the resin flowers or charms in the kits. Press decorations firmly into place. If you wish to place a crystal in the center of a flower or charm, use a small ball of clay to adhere the crystal into place. Use the end of the toothpick to remove any clay that may ooze out from under the crystal.
Using the waxed toothpick, gently select the Chaton (crystal) on the top flat surface of the crystal and place into the clay.
If you find the wax is too soft, you can cool it in the refrigerator or on an ice pack before using, or remove the bulk of it from the toothpick. You only need a little wax to pick up a crystal. For the very small crystals, I find I don’t need the whole ball of wax, only a thin coating of wax on one end of the toothpick works best. Twist and roll the toothpick off the crystal and use the other end of the toothpick to press it into the clay up to the foil line on the crystal. Repeat the process until you have completed your design.
Be sure to clean any unwanted clay from the surfaces of the finished piece. Once cured, Ceralun is permanent. You don’t want it obscuring your crystals, and you don’t want it in unwanted places on the jewelry piece.
Allow the Ceralun to cure overnight in a covered container.
Once cured, wipe the surface of the crystals to remove any wax.
*To extend the workable life of Ceralun that has already been mixed, put it in a sealed zipper bag and store in the freezer for up to 24 hours.
For more fun kits, please visit me at www.anniehowes.com
Customer Favorites